Day 41 - the next milestone!
So this is a big leap forward in what has seemed like forever, as today I had help from a couple of people (Blobby - named after the Noels House Party one for those of you in the UK and old enough!) and my brother-in-law (who had just popped round to visit while they were in Norfolk - bad timing for him, great for me!)
First up uncovered what I had so far in the way of roof and floor.
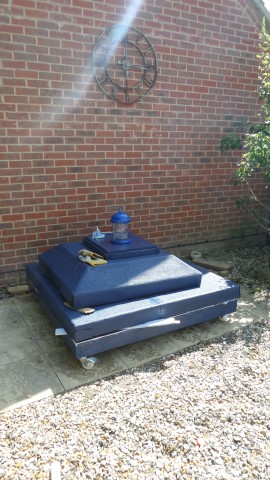
I think I'll need to make the sides a little higher before I'm done!
Time had to be moved for the next stage, as it would be in the way of this TARDIS!
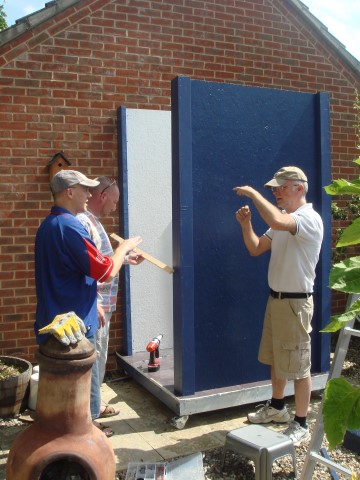
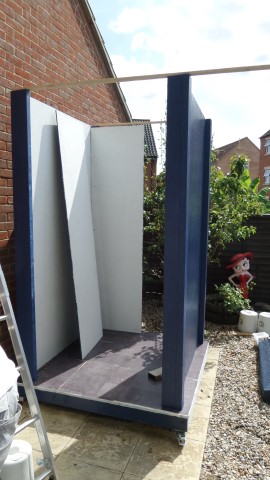
With the clock gone, the 2 corner posts were put in first (with a bit of encouragement from a rubber mallet!) so they would lean against the wall worst case
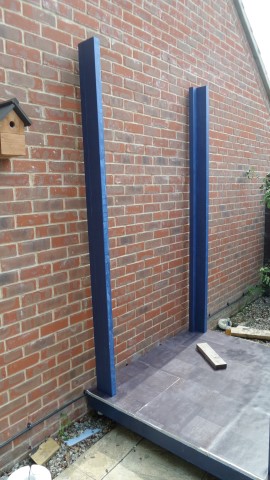
Once they were in, we were able to fix a side on and then spin the base round on it's wheels and do the same with the opposite side
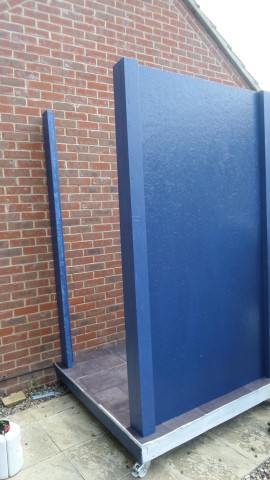
We (Blobby) trimmed some of the height off the sides (still with only my handsaws!), as although I'd guessed and taken a chunk off everything previously, it still wasn't enough. We were just over 87" from the floor of the TARDIS to the top of each corner post, so a couple of inches more had to come off each side.
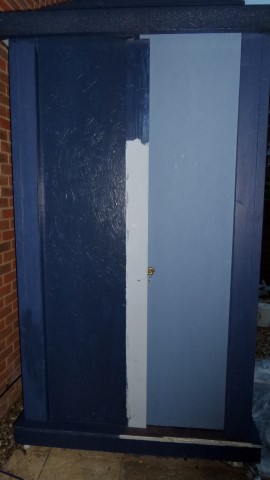
2 sides up and fixed in place, meant it was time to do the doors.
I made the executive decision that only one half of each door pair would open, mainly as nothing large is going in there and it's one less thing to worry about.
I'm not actually sure what we were talking about here, but seemed like an 80s rave with Big Box, Little Box going on!
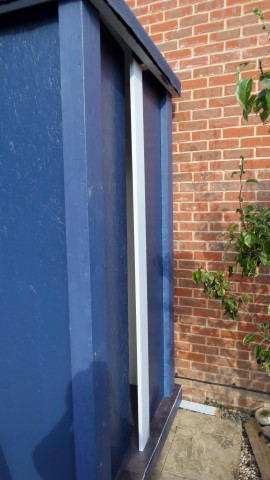
So what you are seeing here are the back doors, made from 9mm ply as these will hardly be opened once the Tardis is spun back the correct way, the left side as you look at this is screwed in place, the right hand side is on 3 hinges.
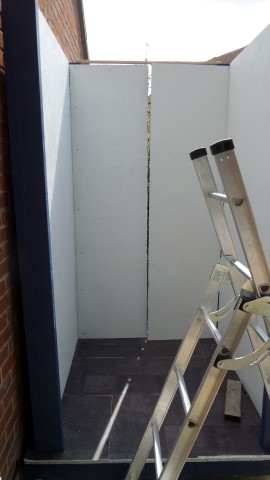
It was lifted from the floor using an off cut, and then hinged to the side wall. A bit of height was taken off of each again, plus about 5mm the full length of the board so it will actually open!
There's a small piece temporarily screwed down on each corner above the doors just to hold the sides square for the moment, as we were in and out of the tardis so they would have moved!
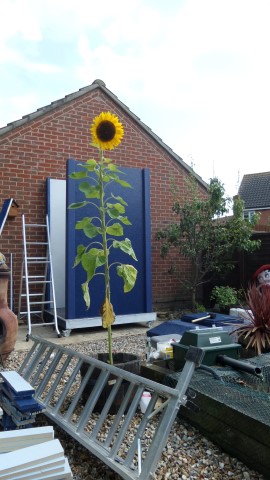
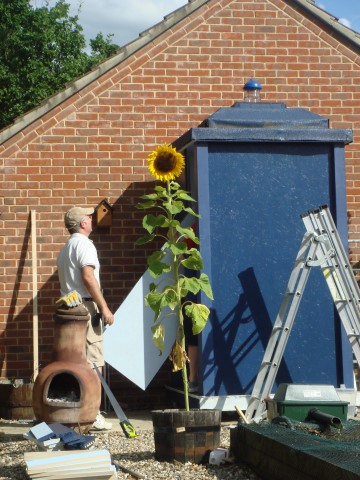
It had been mentioned how big this is, but taken from the right angle while we're working and it's no bigger than our sunflower!
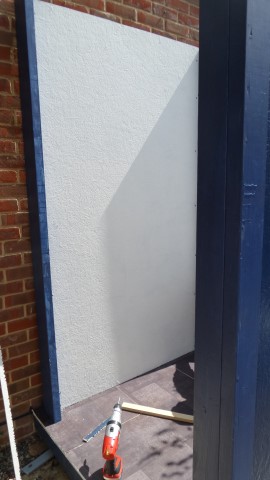
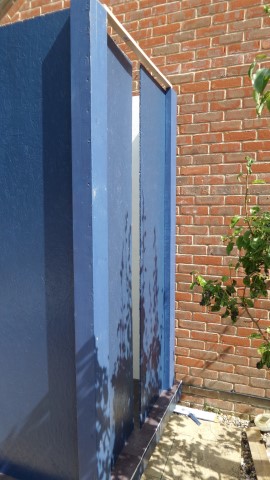
We put repeated the half fixed, half as a door method for the front, but these use thicker 18mm wood, as it'll be the regularly used entrance.
We were definitely doing ok, as our supervisor was able to take his tea break in the build so far!
Next up was everything crossed time and an attempt at putting the roof on!
Doors were taken back off briefly for this and if my non-existent plans, wild guessing and winging it as I've been doing this build were any good, then we would be able to simply lift the roof onto the top and the corner posts would sit inside... :-X
Drum roll and....
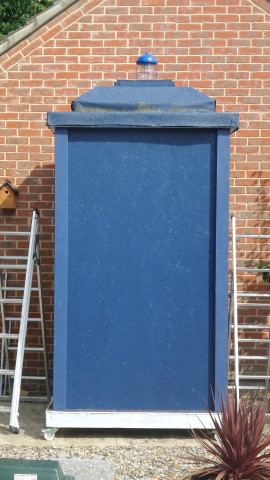
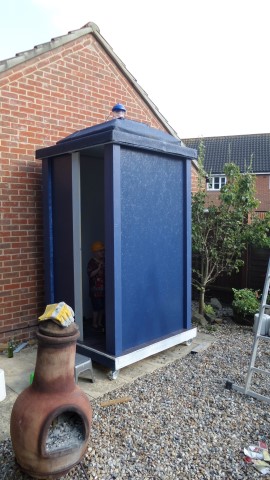
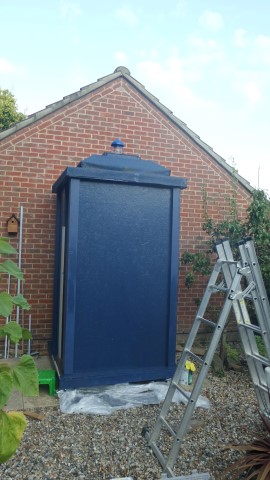
IT FITS! RESULT!
I mean, never in doubt obviously...
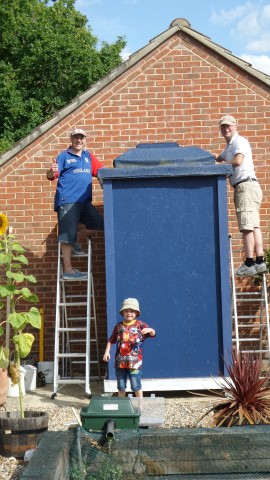
Boy was it heavy to lift up onto the top, 2 of us on ladders and 2 on the floor lifting it overhead, but at least we know it's not going to be falling off!
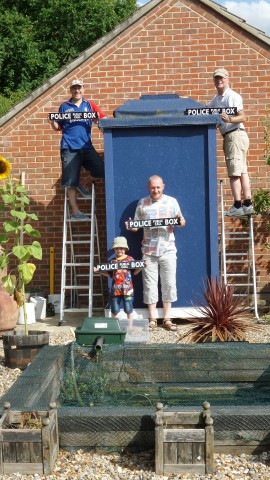
A quick pose with the signs just in case the neighbours didn't know what we were building!
Oh and one with the light just sitting on top for the hell of it!
We let Darren slip away after the heavy bit was done, so then there were two of us for the next bits.
The doors had to be fixed properly, so a bit of trimming the width and height so we could fit them (I should mention here that Blobby is actually a qualified cabinet maker so a perfect help for this day - a job from his early working career and nifty with the old saw, which was a bonus as I do a rubbish job hanging the washing properly according to the missus, let alone what I'd do to any doors!)
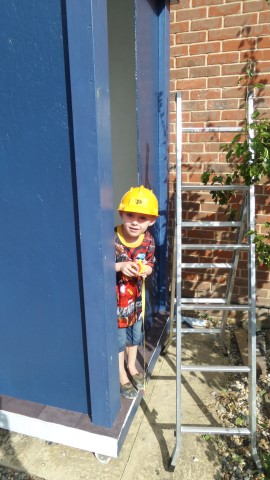
The supervisor was still doing his bit while all this was going on and fully testing the exits!
So there you have the front door hanging in place
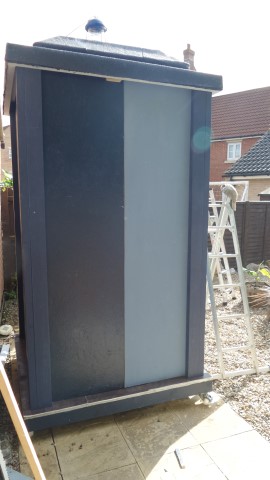
But as you can see, as i'm getting this stuff out of the shed, i'm finding I never actually got round to repainting it all, more jobs for later!
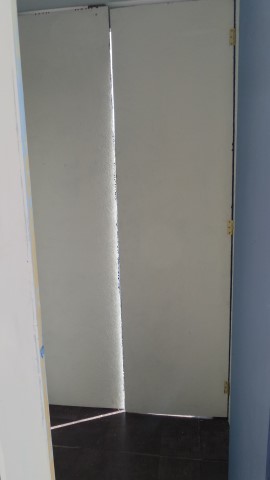
And a look through to see the back door hanging in place
My next idea was to screw an overlap piece to the door halves that do not move, and as the doors swing inwards, from the outside it will help block the gap from the elements.
Finally for the end of the day, even my wife got stuck into the painting (I think the fact that once this is finished she gets her shed back is a great encouragement for getting involved!)
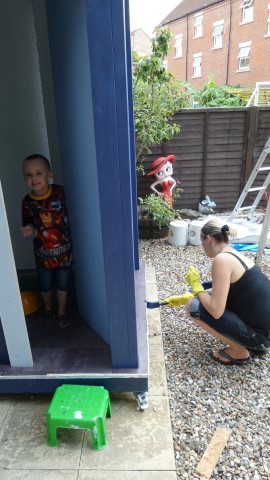
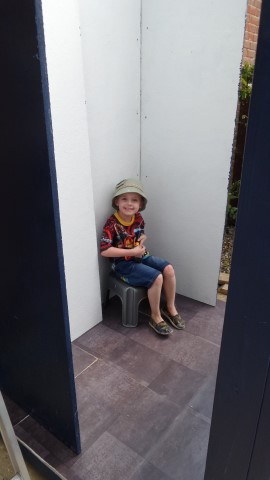
As you could see, someone is also pleased with his new playhouse, even if it's not finished yet!
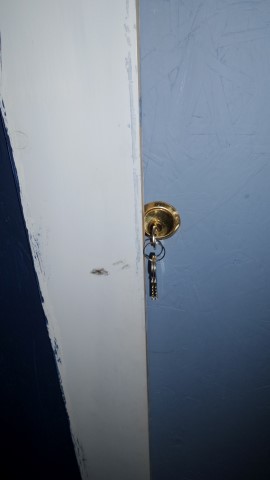
And finally I thought I'd stick a lock on the door.
For the back doors I've just used a couple of old slide bolts I had laying around, but for the front an actual Yale lock (ebay again!)
Took me a while to fit, as the instructions were useless, drill hole, fit barrel, screw together.
Not exactly detailed, but then again, I've got this far without a plan so a small lock was never going to beat me!
And last but not least for today (it was about 10pm by now!)
The lock ended up a bit far over but it works and that's all that really matters!
So that's it, on what was a long, hot and knackering day, but finally it's big, it's blue and it's not a portaloo!
I have the shape of a custom build tardis at last!
Lots more to do, and 7 weeks until a birthday party, so there will be some late nights as not a lot of weekends without things already arranged, but we're getting there!
Until next time!